Ebay is beginning to roll out an exciting new store format to its sellers. We are really pleased with how the new look works for our store and the increase in traffic we can see already. Have you gotten an invitation to convert your store and been unsure what to do? With a bit of graphics work you can take advantage of this more professional design and put your best foot forward in the world of on-line selling. But what if you don’t have Photoshop or are reluctant to hire a designer? If you know how to use the basics of Microsoft Publisher, you can easily create your own header. Following these same steps will also work for creating a header for your blog.
Here goes!
1. Before you begin to create your header select a photo or photos that help you tell the story of what your store or blog is all about. I used 3 photos in my header that showcase our products. The photos had previously been sized to a width of 500 pixels. I size all my photos down for both eBay and my blog so that they load in quickly and can easily be viewed on a cell phone. (You don’t want to make your customers or readers work hard to view your stuff.) You can size your photos in any basic photo editor that you already own. Since we sell machined products, these are the photos I chose.


2. Next, you need to know that the maximum dimensions for the new header are 1200 pixels x 270 pixels and 12 MB. I played around with the header size until I got it as close to that as I could without going over to maximize the visual impact of our header.
3. First,to create a background for your header, draw a rectangle using the “insert shapes” tool. Then resize it to 7.96″ wide by 1.75″ high by typing in the exact dimensions in the sizing box. This will fit into the allowed maximum pixels.
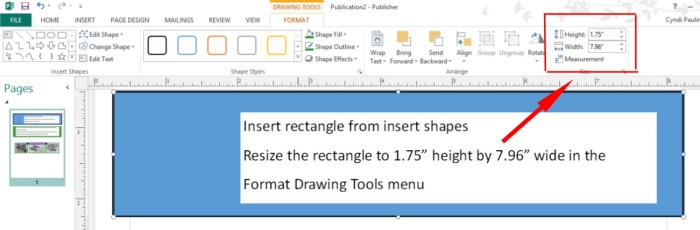
Go to insert shapes and draw a rectangle. Resize it to the exact size needed by typing in the size box.
4. Choose the color for your background. Using the shape fill and shape outline tools select the colors you want to use. Selecting colors that match your website or logo is one option. You could also choose white depending upon what image you are using. For a clean look I used the same color background and outline. If you used white you might prefer a different colored outline.

choose color of background & outline
4. Place your images over the rectangle. If you can’t “see” them – use the “bring forward” or “send backward” tool to get your images layered in the correct order. Hint: You can nudge an image into an exact spot by holding down the alt key while using the arrow keys. Alternatively, I sometimes draw in a temporary bright-colored line to use as a guide to line up my photos and then delete it when I’m done.
5. Next, group the photos and background together to hold everything in place. (To group simply put the mouse pointer in a corner just outside of the elements and draw a “lasso” around the whole group. Then select group on the toolbar to group them together as a single entity.)

group elements together. make sure all elements are selected as shown
6. Add text. To add your store or blog name or a tag line you will essentially repeat the steps you just followed. Create a text box and type in your text. Then draw a rectangle the size you want to add a background color behind your text (if you wish). Place the text box over the background rectangle, using the “bring forward” or “send backward” tool if necessary. Group your items together. Then place the text box where you want it in the photo box you previously created. My text box has a blue background and white letters.

add text – title or tag line
7. Save as an image. First group all of the elements together including the text you just added. Then, right-click on your grouped image. Choose “save as a picture” from the menu that pops up. Select .jpg or whatever picture format you wish to save your header as. Choose the folder you want to save your image in and save.
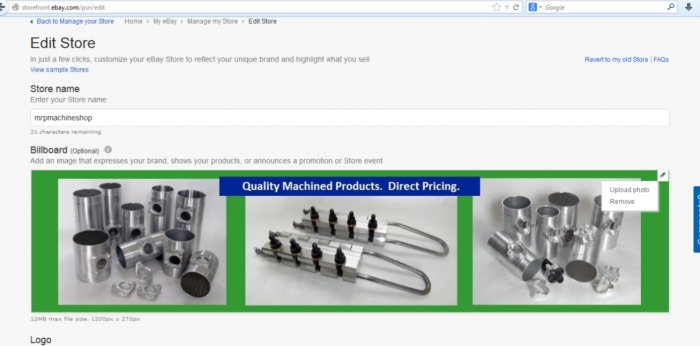
To upload your image to eBay.
1 – Go to “Manage my store”. 2 – Then go to “edit store”. 3. In the box for your store billboard browse to find the header image you just created and then upload. Voila!
Note: The new store format requires that your store logo be a 150x 150 pixel square rather than the old rectangle format. You can modify your logo using the tools you just learned. Create a square using insert shapes. Choose the background color and outline color you want . Place your logo in the square. Group together and then right-click and “save as a picture”. If you need to resize it smaller just use one of the photo editing tools you already have to fine tune it to the correct size.
See what the new store format looks like live here.
Good luck with creating your own header. I hope these tips help.
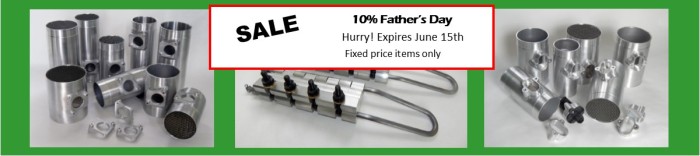
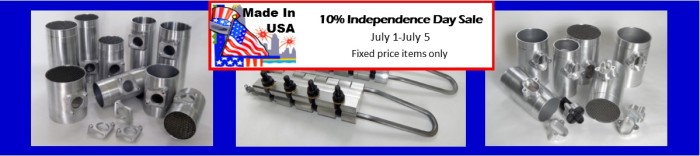
Quick update! Now that you know how to make a banner, don’t forget you can update for seasonal changes or when running an Ebay sale. Below are a couple examples of recent billboards we have made.


I have already created a header (billboard image) for my eBay store but can not find how (WHERE) to upload it? My store has a theme and I can change the theme but no header image upload option. Please, help!
LikeLike
On the seller dashboard go to selling tools section. Then select manage store. On manage store page select edit store. The first item below store name is billboard. That’s where you upload your header. Good luck!
LikeLike
Thank you so much for this! With the step by step instructions you gave I was able to create my Ebay Billboard.
LikeLiked by 1 person
You are very welcome! Glad it helped. 🙂
LikeLike
nice
LikeLike
Can I add a manufacturer logo if I sell their products?
LikeLike
You would want to check eBay policy on that or give them a call. There are pretty specific guidelines about using any trademarked images or words to avoid sanctions. What you can use in a listing might be different from the header.
LikeLike
Thank you so much, with your instructions I was able to finally do my own billboard.
LikeLike
You are very welcome, Marie! I hope it increases the sales in your store. I’d love to see it if you care to post a link in the comments.
LikeLike
These tips definitely help! Thanks for putting together such an easy to follow post on making our own headers in Publisher. Love it. Cheers! Gina
LikeLike
You are most welcome, Gina. I’m glad you found the info helpful.
LikeLike